How to Build a Robot Car? - Part One


Robotic Education: Have you ever wanted to see your own robot car roving around? Build one with a few electronics parts, an Arduino micro-controller, and copy-paste programming. Even if you've never tried a project like this before, take the chance to practice your soldering and get familiar with some basic code.
Step 1: Gather materials
You'll need the following materials to build your robot car. If you're not sure what size each component should be, read over these instructions to get a feel for how they fit together.
- Two motors
- Two wheels
- Arduino microcontroller board (the Arduino Uno is a good choice for beginners)
- Motor driver shield or motor driver circuit (found in remote-controlled toy cars)
- Battery holder and 6 volts of batteries (e.g. four AA batteries)
- Chassis: a sheet of acrylic or plexiglass, about 6.5 x 4.5 inches (16.5 x 11.5cm)

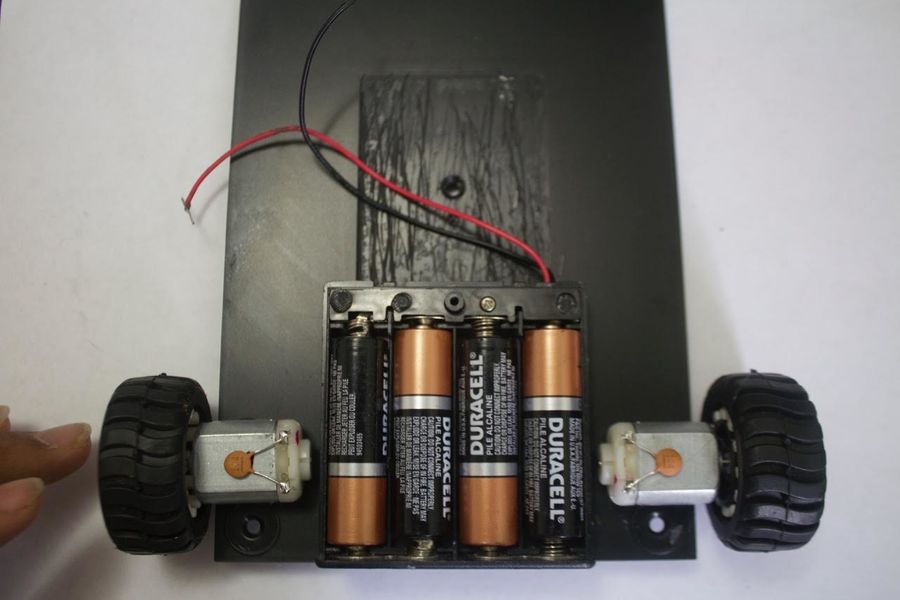
Step 2: Attach the wheels and motors to the chassis
Thread each wheel onto one of the motors. Hot glue the motor onto the chassis as follows:
- Mark two locations near one end of the chassis, opposite each other.

- Glue one motor over each location, on the upper side of the chassis. Make sure the wheel hangs over the edge so it can roll along the ground.

Step 3: Glue on the battery holder
Add a dollop of hot glue to the top side of the chassis, between the wheels. Press the battery holder here and let set.
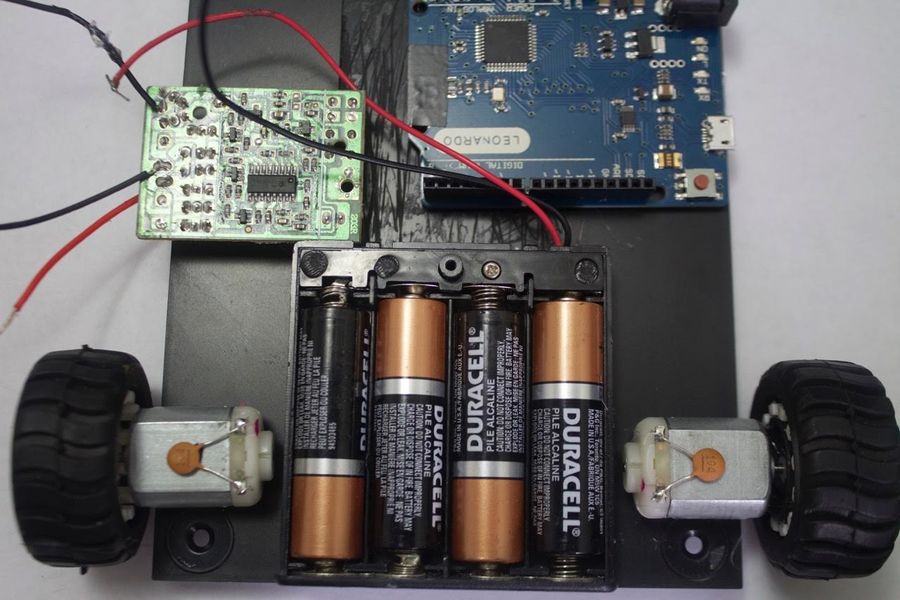
Step 4: Attach the motor driver circuit
Position the motor driver circuit near one side of the chassis, with the wires overhanging the edge.

Step 5: Position the Arduino
Glue the Arduino onto the chassis, tucked opposite the driver circuit. When positioning it, make sure you have access to the socket for plugging the Arduino into the computer.
" Finished - Part One "
 Add Comment


