How to build a simple robot?


Robotic Education: There are lots of complex, time-consuming ways to build a robot, but there are also many simple ways. For instance, you can build a beginner's robot that shakes across the surface using a hobby motor, 9V battery, metal coin, and small plastic containers. While this robot won't do any fancy tricks, it's a good starting point for learning about the field of robotics.
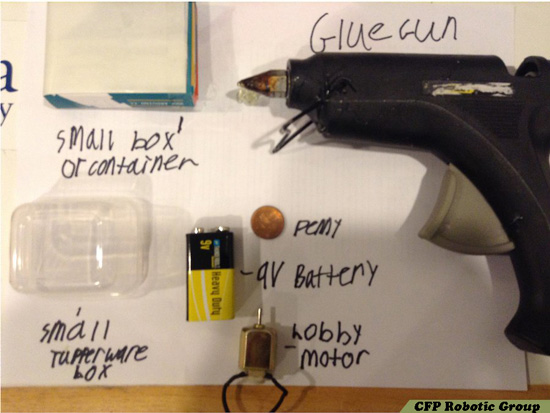
Step 1: Items Needed
- Glue Gun
- Small Box or Container
- Penny
- Small Tufferware Box
- 9V Battery
- Hobby Motor
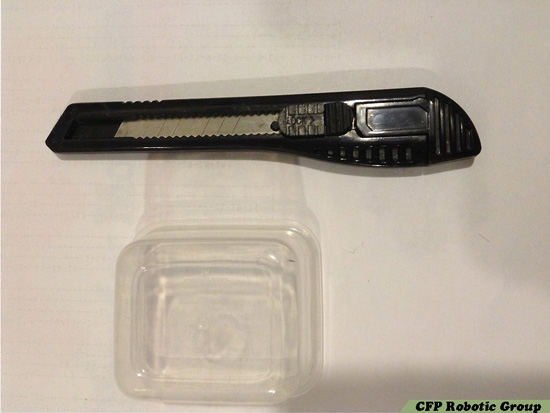
Step 2: Cut a hole in the tupperware box for the motor using a utility knife.
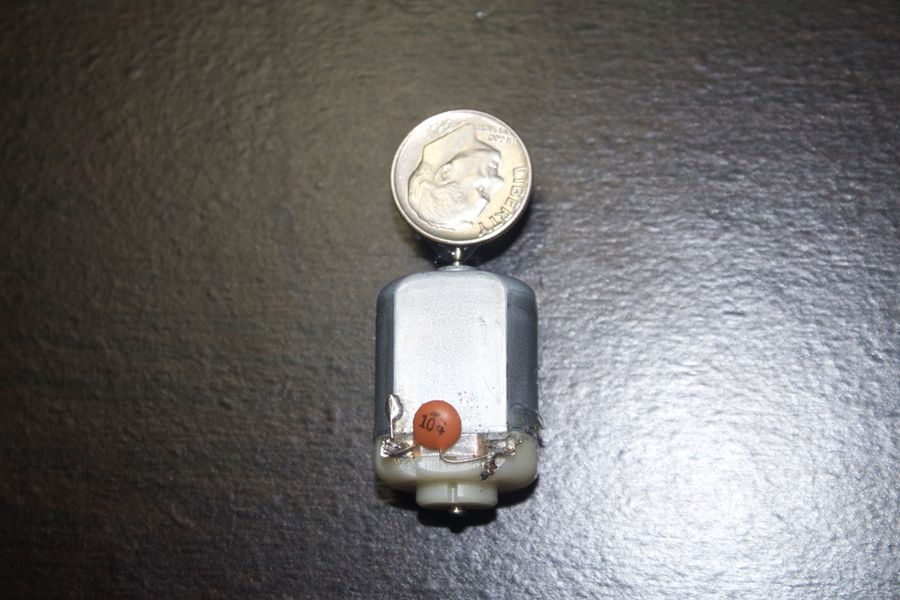
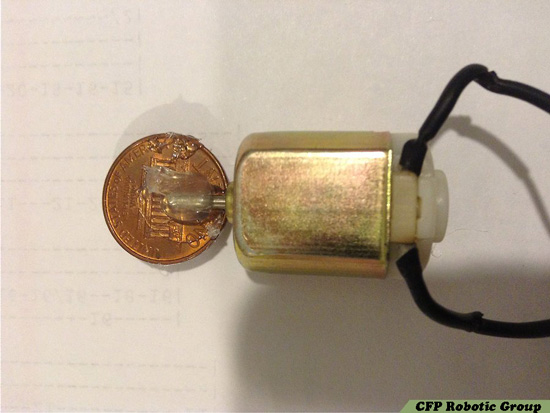
Step 3: Acquire a motor like the one shown above from any hobby store.
The motor should have exposed metal which wired can be soldered on to. Ask your hobby store to give you a motor that can be soldered and modified.
Step 4: Solder one wire to the right side of the motor. Be sure that the metal tip of the wire touches the metal on the motor.
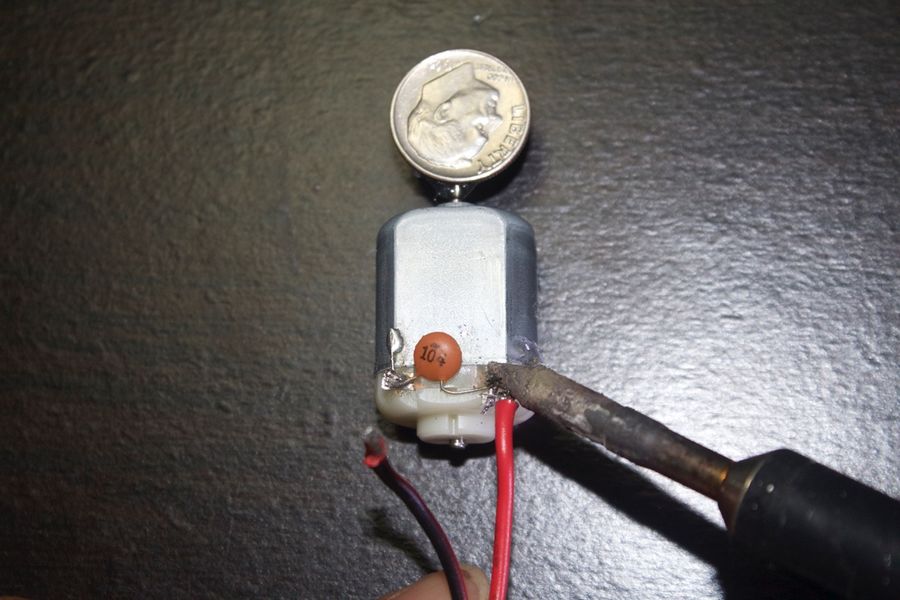
Step 5: Attach the other end of the wire to the left side of the battery. Again, be sure that the metal tip from the wire touches the metal of the motor.
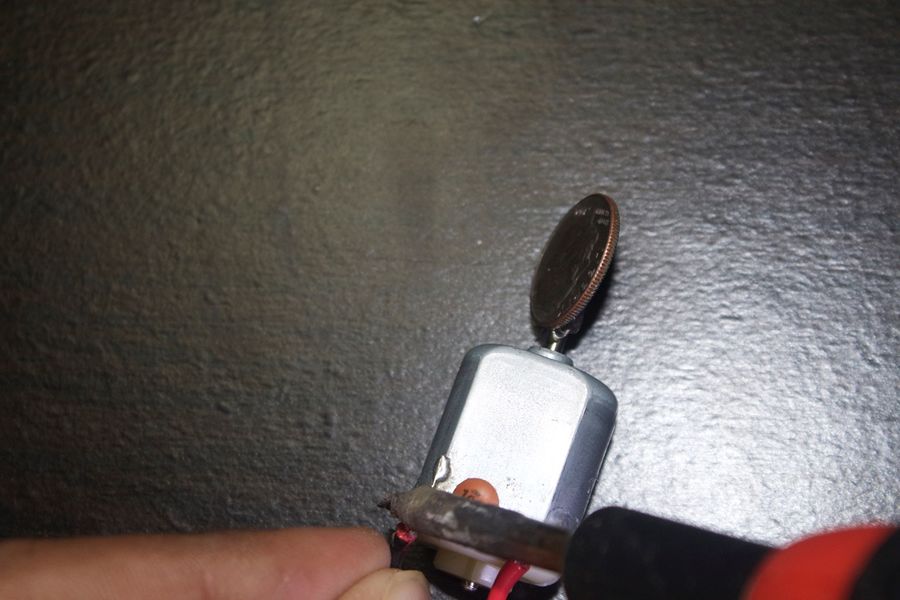
Step 6: Glue your quarter, dime, or penny to the shaft of the motor with hot glue.
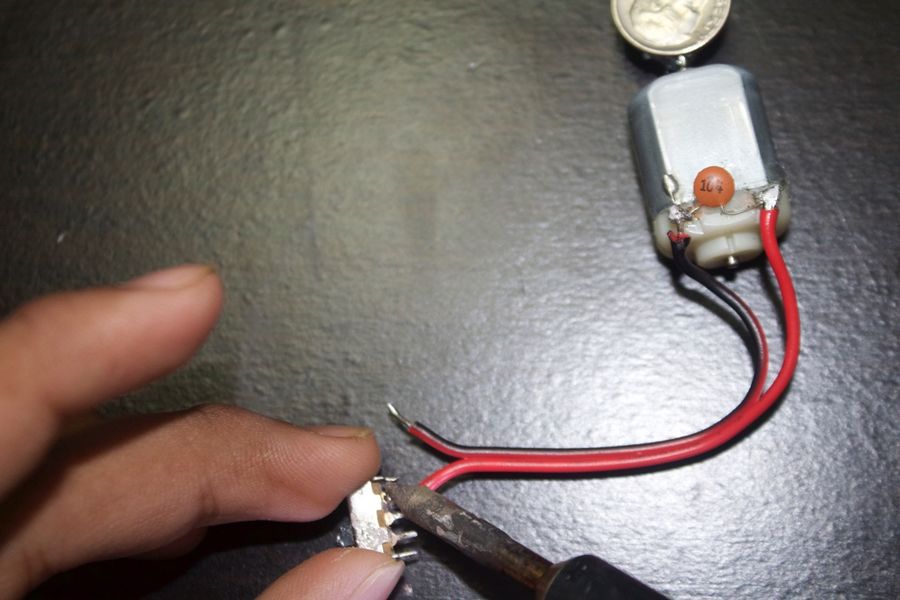
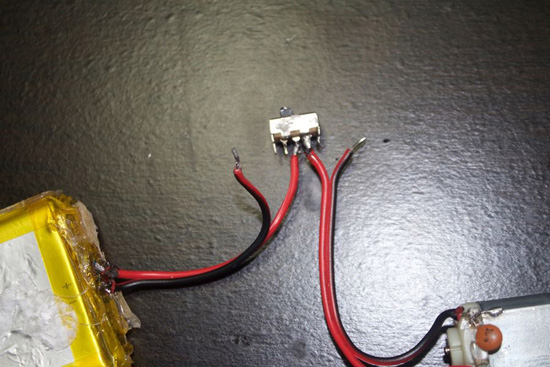
Step 7: Solder the positive(red) motor wire to any non-momentary switch. The switch in the picture above is a SPST (Single Pole Single Throw) switch. A non-momentary switch is any switch that doesn't require a constant hold on the switch for electricity to pass through. This means that you can press the switch once and electricity will pass through until you press it again to turn it off.
- Again, be sure that the metal tip of the wire is attached to one of the metal prongs on the switch.
Step 8: Glue the motor into the hole you cut for it, and glue anything else on that you want to.
Step 9: Using another set of wires, wire up a battery to your robot. Solder the positive (red) tip of the wire to the positive lead of the battery and the negative (black) tip of the wire to the negative lead of the battery.

Step 10: Solder the positive (red) tip of the wire connected to the battery to the center pin of the switch. Be sure the metal tip is touching the center metal prong of the switch before you solder.
- This will let the electricity flow from the battery through the switch and then to the motor.
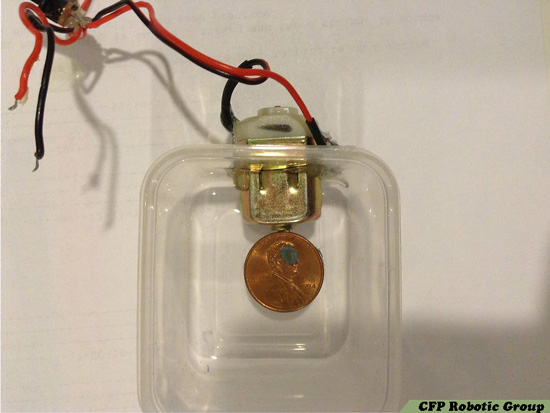
Step 11: Glue the lid of the tupperware box to your small cardboard box, again using hot glue.
Step 12: Put the tupperware box on the lid, and the battery can be tucked inside the cardboard box and you're done!

 Add Comment


